PhotobucketPhotobucketPhotobucketPhotobucketPhotobucketPhotobucket
Showing posts with label DIY. Show all posts

10.19.2015

DIY Ikea Hack Chest of Drawers

Ever since moving into my apartment in May, I have envisioned a pair of small dressers flanking my fireplace. This is one of my favourite looks and it also provides some much needed storage for my board games, dvds, cozy blankets for watching tv, etc. My dream was to find a matching vintage pair, but this proved to be a challenge. Vintage pairs of anything are hard to find, and because of their rarity are usually pretty expensive when you do finally find anything. I decided that for now, the best plan would be to try my hand at an ikea hack.

I bought the KOPPANG 3 drawer chest. I liked the simple lines as a nice blank canvas and the price was right.
I did the rest of the steps after assembling the dresser, but if I were to do it again I would add the trim and paint everything before putting it together to make the job easier.

Next I bought some small decorative trim from the Home Depot and used a saw and mitre box to cut it. I glued the trim pieces onto the drawer faces using No More Nails glue and filled in any gaps in the mitred corners with paintable caulking. The trim really helps to make this streamlined piece look more traditional.

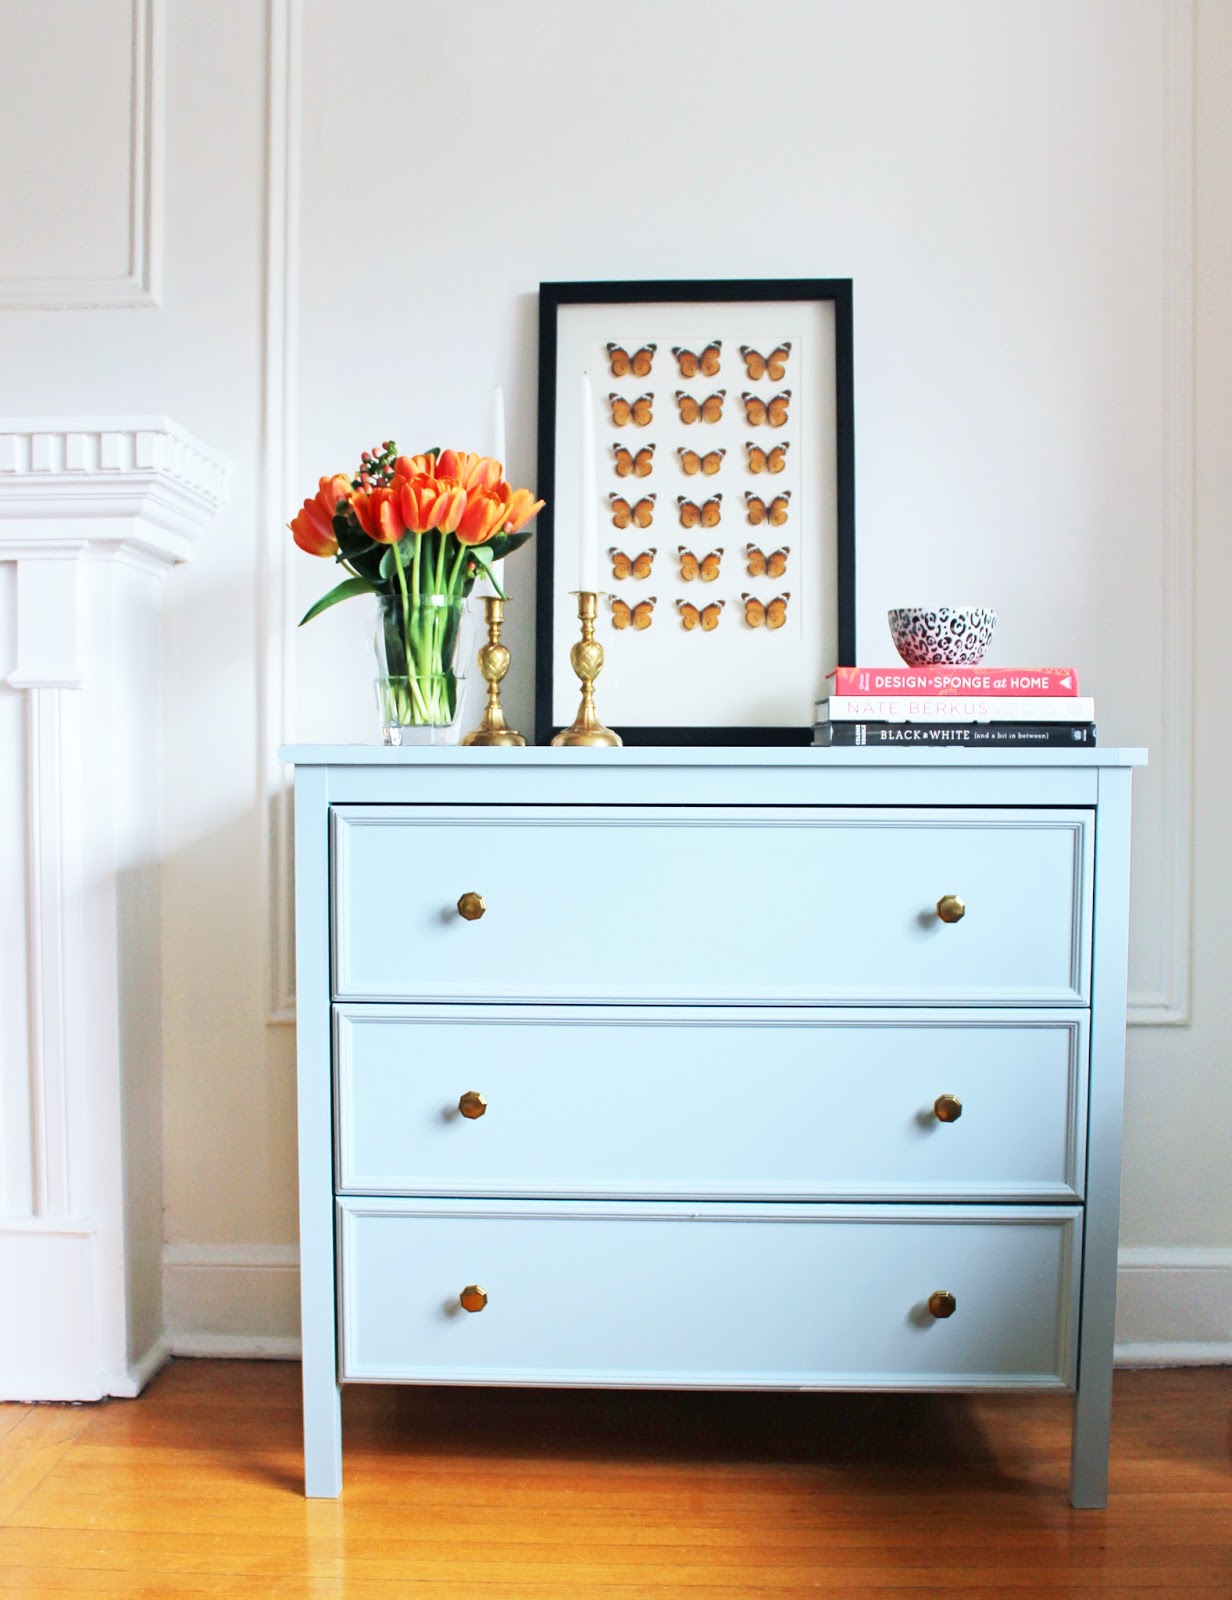
Next came priming and paint. I used the Zinnser Shellac Based primer (which Jenny of Little Green Notebook swears by for painting IKEA furniture).  I painted out the dressers in a beautiful robin's egg blue called Cape Hope by Beauti-Tone paints.
Lastly, I switched out the cheapy-cheap black plastic knobs that came with the dresser for some pretty brass octagonal knobs that I got a liquidation shop in my home town for only $2 a piece and voila!
I think that the dressers now have that vintage/traditional look that I was hunting for. It's also my first time owning any painted furniture, and I have to say, I'm loving the dose of colour!!


The place is really coming together! In the living room all that's left to do is a buy few accessories, get my cane chairs reupholstered, sew a couple of small lumbar pillows and paint something big for over the sofa. In an ideal world I would also ditch that ceiling fan. Have you ever done an ikea hack? Share the link in the comments and I will be sure to check it out!

xox
Photobucket


2.13.2014

Closet Dreaming: Walk-In Closet Makeover Plans

So as you may have seen if you follow me on Instagram, I'm thinking about giving my giant walk-in closet a mini makeover. It just feels cluttered, disorganized, and not living up to its full potential. Also, my hamper broke resulting in a growing mountain of laundry taking up most of the floor space. Of course, the most boring cost effective solution would be to replace the hamper, which I fully intend, but I figure why not have a little fun with the space too?

The only thing is that I'm questioning whether or not it is worth investing money into, when I only plan on being in this rental for another 18 months or so. But I think I can do it on a tight budget, and if I spend money on solutions that I can take with me to my next place (although I doubt I will find another closet this big), it will be worth it. I'm thinking $250-300 is a reasonable budget for the space.
I've dreamed up this moodboard with my current ideas for the space:
I love the idea of adding some dressers because everything looks more organized behind closed storage. I want the space to feel sexy and glamorous.

I've come across a couple of other great ideas that I would love to implement in my walk-in: 
via Design Darling
^ I love Mackenzie's idea of using an acrylic letter sorter to organize clutches. This would look great on top of those dressers!


via Made by Girl
^Maybe I could paper or paint the drawers with a fun pop of pattern or colour like Jen did.

And just in case you need a reminder of how it looks currently, here it is, only today it looks much messier:

So what do you guys think? Should I make this my spring project or do you think it's not worth it?
Cast your vote in the comments!
xox
Photobucket

10.17.2013

Halloween Throwback DIY: Gold Skull

I was at Michael's the other day grabbing some watercolour supplies and was happy to spot that this year they restocked the little cardboard skull that I used for my gold skull DIY last year.
This skully used to be a permanent figure on my coffee table, adding the perfect amount of edge to an otherwise pretty space. The zebra has since taken over, but I brought this guy back out for some Halloween fun!
 Pretty glamorous for a dead guy, right? Check out the full throwback DIY HERE. I promise it is quick, easy and inexpensive.
Do you guys go all out or minimal with your Halloween decor?
Photobucket

11.19.2012

DIY Leopard Acrylic Tray

After last week's one dollar dino post, I had a couple of e-mails asking about my leopard lucite tray.
It's actually a fantastically simple DIY inspired by the lovely Eileen of A Creative Day.
 Eileen's tray was inspired by the 'les touches' fabric and was created very simply with a gold leaf pen.
via A Creative Day
I was in love, and knew I had a small lucite tray that needed some leopard loving of it's own (I purchased it at Home Sense for around $5). AND it just so happened that I had the same gold leaf pen, so how could I not?
I went with a more traditional leopard design.

Now it's a perfection place for jewelry:

 Sunnies:

Every day beautify products:

Or even office supplies:

I just love it!
Hope you had a great weekend dolls xo
Photobucket

9.18.2012

My DIY Greek Key Bench

  Two DIYs in one week? Moving really has me on the ball people.
Today I bring to you the story of a bench.
^ Here is what it looks like now. I use it as a coffee table/ottoman in front of my couch, but it could easily go at the foot of a bed or in a front foyer! I love how versatile a good bench is.

Let's travel back in time to July, 2011 to see what the piece used to be:
Picked this baby up at Good Will for $4. It was chipped, bubbling and a strange height for a coffee table. But I saw the potential of those great legs (and yes, it took me over a year to finish even start this one).

The First step was to remove the top of the table:
^ It was attached with these L-brackets that easily unscrewed.

Next, I used the top as a template to cut out the 2inch upholstery foam that would sit on top to form the cushion of the bench.
I cut out the foam with a serrated knife and used spray adhesive to attach it to the table top. I did the same for a layer of cotton batting.
^Since my bench is four feet long, I ordered 2 yards of fabric and cut it down to size.
The fabric I chose was 'Greek Key, Buff' from Tonic Living.

Then, with the help of my parents, I staple gunned the fabric to the underside of the table and reattached the top. Oh and I also painted the base of the bench white!


I'm so pleased with the end result. The entire project cost me around $40. I had the paint leftover from an old project so that kept costs low, but it required very little paint!
Then, on a trip to Home Sense, I was even more pleased when I spotted this:

The EXACT same fabric on a similar looking bench for 200 dollars!

Pretty amazing if you ask me!
xo
Photobucket

9.17.2012

DIY: Gold Skull

What a weekend that was my loves! But I am officially moved in to my new place in TORONTO. Though I'm feeling a bit lonely right now, I love the space and know that soon enough it will feel like home.

Today I've got an easy peasy skull tutorial, perfect for the fall, Halloween, or really just any time of the year if you ask me!

This tutorial is inspired by the latest skull trend, and more specifically this image:
via
If you have a Micheals near by, you're set, because that's  where I got all of my supplies! If not, its Halloween decor time so you should be able to find skulls at local dollar stores, etc.

Supplies: Skull and Gold Spray Paint (seriously, that's it...maybe some newspaper).
^ I found this paper mache guy at Micheals for only $2 (when I used the weekly 40% off coupon).

The one and only step: Spray paint!!!! I did three coats.

Then display and enjoy. I just love how this little guy adds some edge to my new home!

I have a whole slew of fun projects to share with you over the next few weeks (including my greek key bench you can see in the photos above), so stay tuned!
xox
Photobucket

9.04.2012

DIY: Touch of Gold Picture Frame

I wanted to frame my ultra glamorous print of Audrey Hepburn that my mom got from a vendor in NYC, but I wasn't sure what colour of frame to use since the print came with a black matte.
I thought white would be too stark of a contrast and take away from the picture, but black might be too basic.
In the end, I went with a plain black Ribba frame, to which I added a gold band on the inner part of the frame.

I love the result, and it was super easy:

1) The Supplies:
Picture Frame (I used Ribba) / Piece of art / Painters tape / Krylon 18kt Gold Leaf Pen

2) Pop the guts (glass, matte, backing etc.) out of the frame, leaving the frame only.
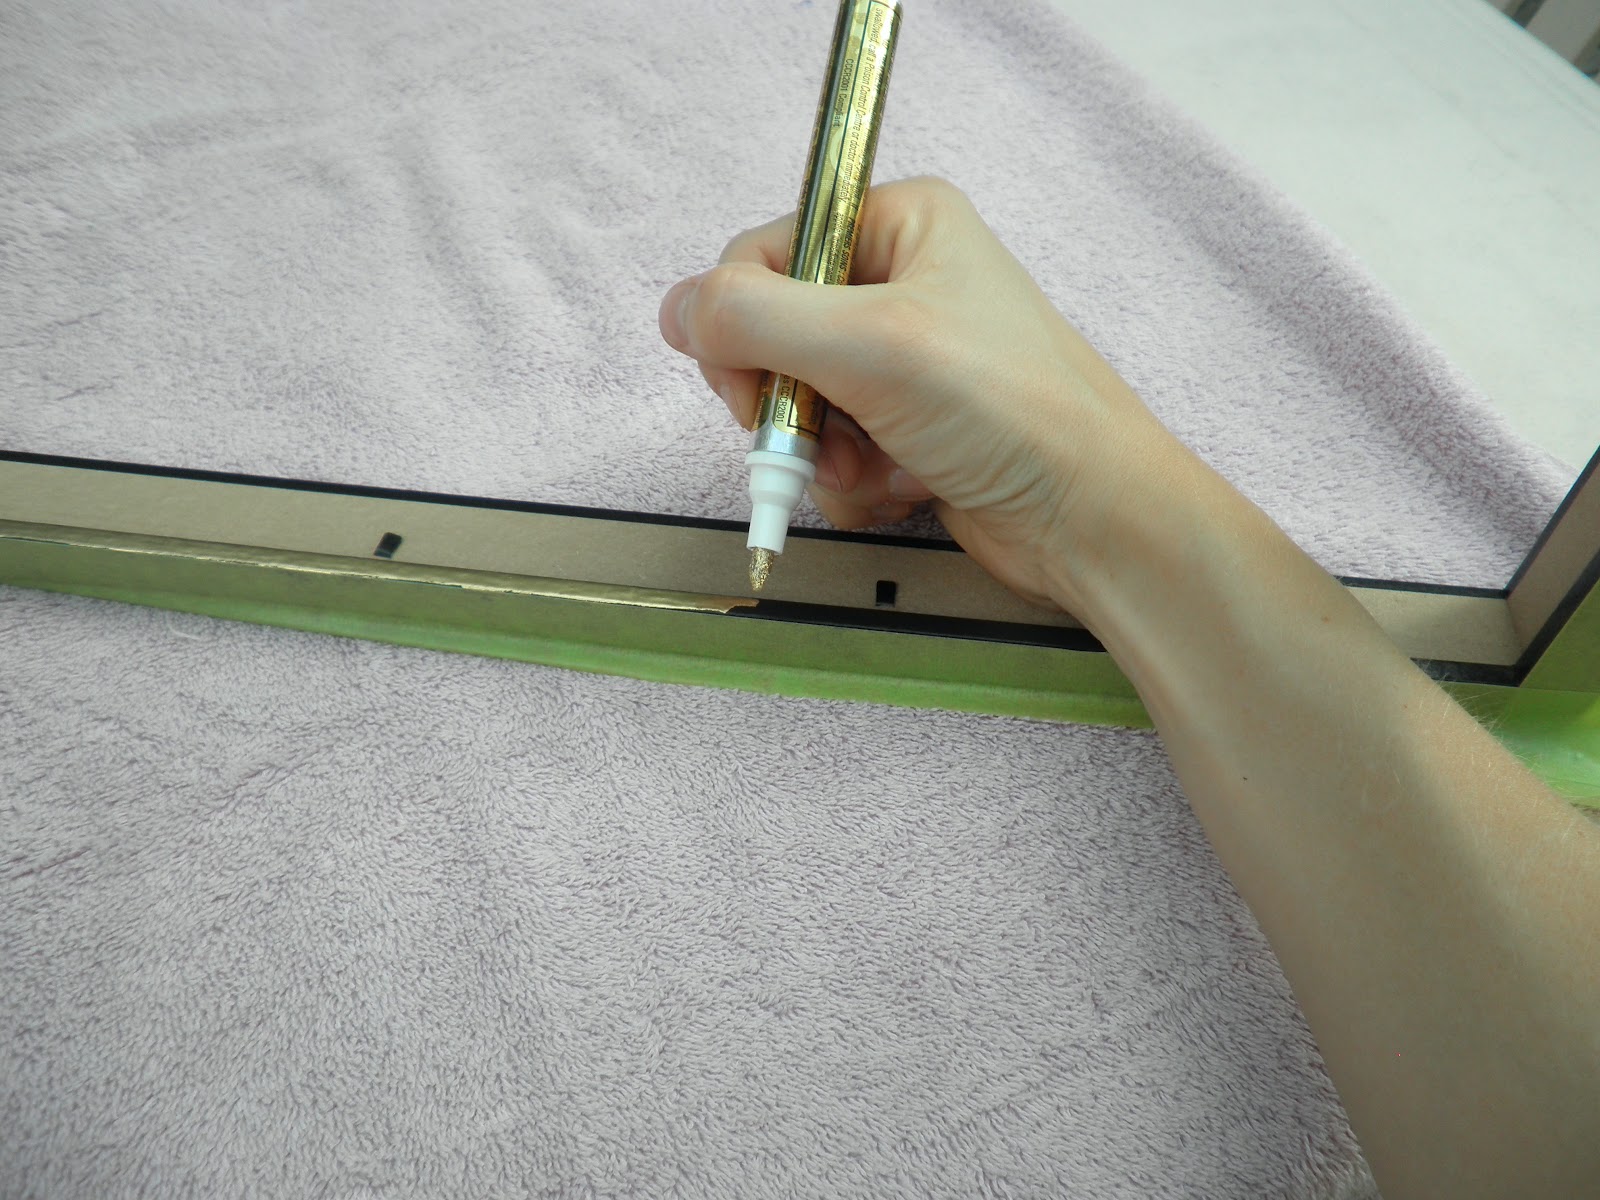
Carefully cover the face of the frame with painter's tape, making sure the edge is straight and clean.

3) Using the gold leaf pen, colour in the inside edge of the frame

4) Allow the paint to dry for about ten minutes

5) Peel  the tape off slowly, frame your art and enjoy!
The result is fantastically subtle. From straight on, the frame looks all black, but viewed from an angle, the touch of gold adds the perfect amount of sparkle.
all photos via Tiffany Leigh Interior Design

A super quick and easy project! What do you think?
xo
Photobucket