PhotobucketPhotobucketPhotobucketPhotobucketPhotobucketPhotobucket

2.15.2016

Cane Chair Makeover - Switch Studio


I was browsing craigslist one afternoon when I saw a listing for a pair of vintage cane chairs on sale at the local (okay, not local, I had to drive about 45 minutes) ReStore. Now, let me tell you, a pair of anything vintage is hard to come by, and when you do find a pair, it usually means $$$. But these were reasonably priced at $50 each, no tax. I knew that I had to have them. 

After folding down the seats in my parents' van and making the drive to the location, I was a bit disappointed to see that the upholstery was in very bad shape. The cream striae velvet was very yellowed and very dark and stained in places, and some spots looked like they had been scratched by a cat, leaving rips and tears in the fabric. Still, they were the perfect thing for the apartment I was on the verge of renting, and I knew with a little love they could be really special. See the before below:
Fast forward 11 months into living at the new apartment and the chairs were still sitting here unchanged. Finally, I enlisted the help of reupholster extraordinaire Staci Edwards of Switch Studio. I left the fabric, chairs and plan in Staci's capable hands and on Saturday, I went to pick them up!! I was so nervous to see them but I am thrilled with how they turned out!
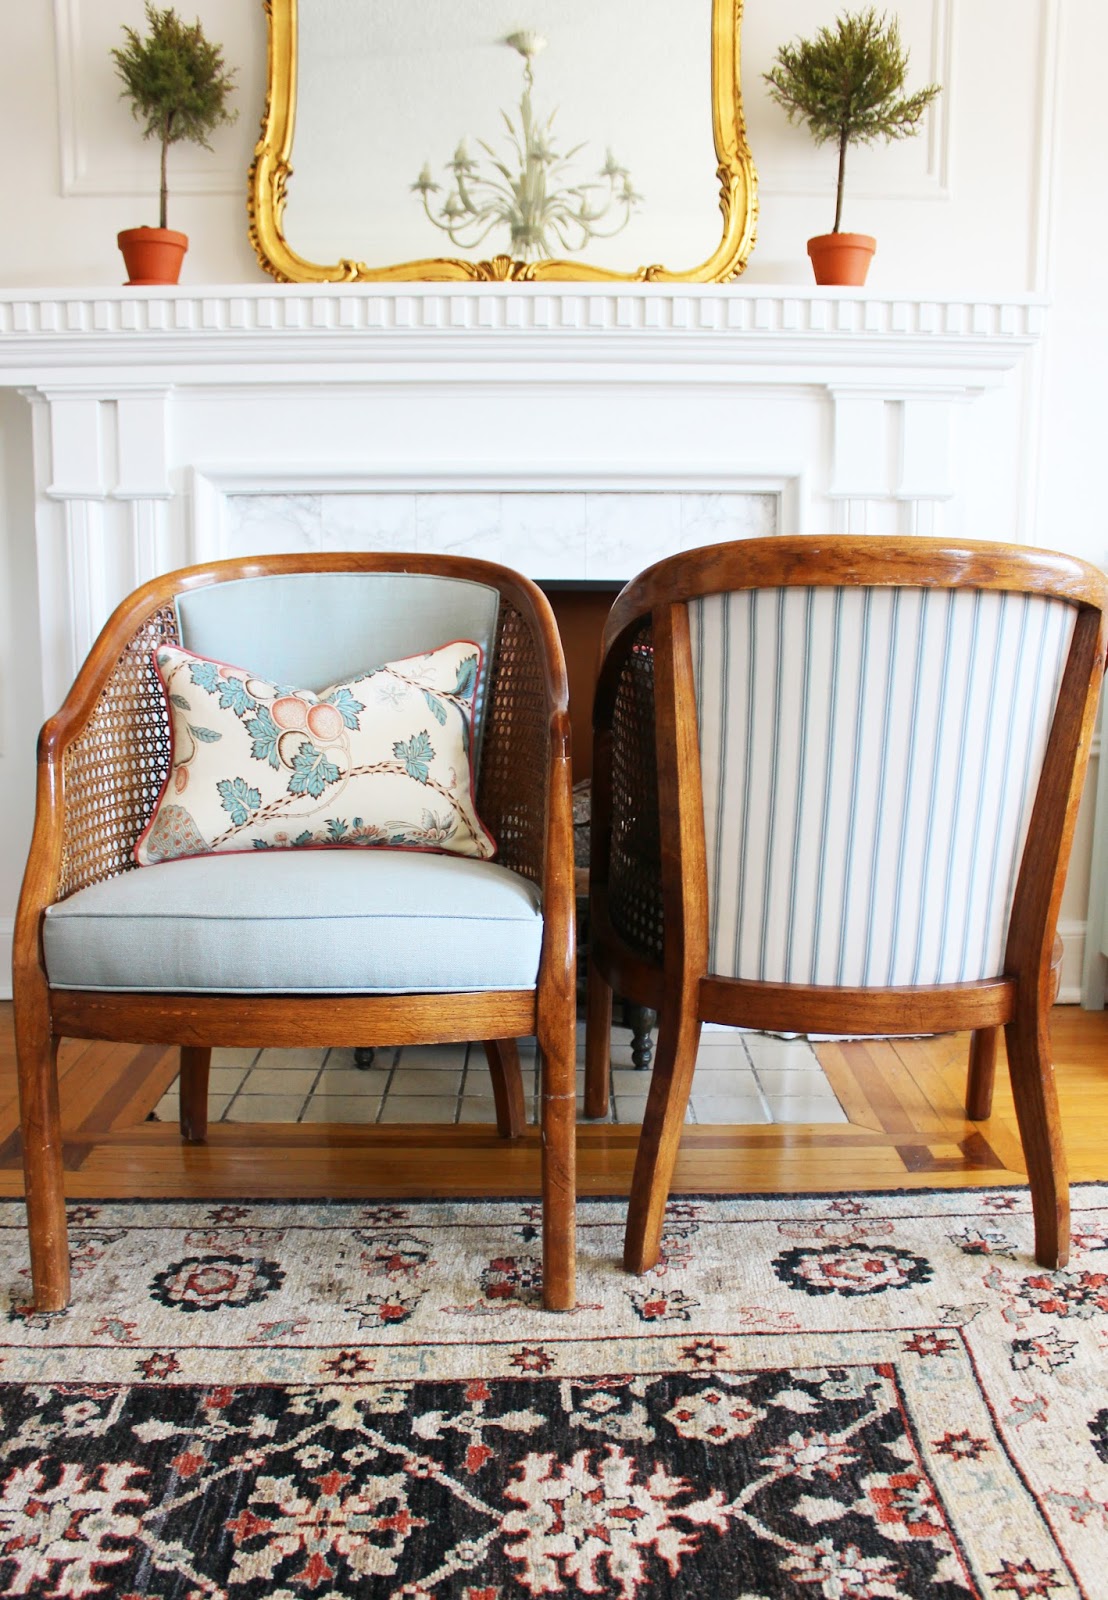


I went with a simple 100% linen in soft blue from Designer Fabrics for the front body of the chair. While I initially thought about doing a striped pipe as well, I think it would have been too busy with the texture of the cane. The stripe on the back panel, however, is the perfect touch. It adds pattern and interest but is not trendy. It is classic and timeless. 

Switch Studio also did up the sweet little lumbar pillows. The Schumacher fabric used was the first 'ah-ha' moment I had when developing the scheme for this room. It really made the corals and aquas in my existing (and beloved) rug make sense, and I used this fabric to pick out the fabric for my sofa cushions. I love the contrasting coral pipe on these pillows. It compliments my coral velvet pillows from Stuck on Hue so nicely. 


 I chose to keep the wooden and cane frames of the chairs in their original condition. They are a little roughed up, but I love the sense of patina and history that they contribute. I like my vintage in vintage condition.

 The peak-a-boo striped back is so charming.


Truthfully, I thought about attempting a DIY reupholstery job on these chairs to save money, but I knew that I wanted to keep these chairs for many years to come and didn't want to mess them up. I wanted them to look perfect, not just 'good enough considering I did it myself'.  

Switch Studio did an amazing job on the chairs and pillows and I couldn't be more thrilled! Well worth the investment. They are located in Oakville and service Oakville, Burlington, Mississauga, Milton, and Greater Toronto Area. If you are looking for an excellent, fairly priced option for reupholstery, this is your spot! A big thank you to Staci Edwards for making my chair dreams come true!
Photobucket

2.13.2016

Project Northlake: Kitchen Reno - Progress Pictures

So much has been happening in my childhood kitchen since the last time that I posted! Although by no means a glamorous post, I thought it might be fun to show you some of the behind the scenes moments and fill you in on a bit of the realities of the reno. My family has been doing most of the work on the kitchen so far. The progress has been quick, but not without its share of setbacks.

We needed to find a new tiler, the hardwood installation got delayed, a hole got punched through the wall into the dining room during demo, we painted the entire first coat of paint before realizing that the colour was mistinted and drying far too bright, our area rug was cut to the wrong size by the binders. What I've come to learn in this industry is that projects rarely, if ever, run perfectly smoothly. When embarking on a renovation, you need to be prepared for things to go wrong, but sometimes managing expectations is easier said than done. Luckily, we are back on track and the finish line is in sight!

We started by tearing out the dated railing that separated the kitchen from the sunken family room. This is really going to help to open up and modernize the space.


My parents ripped up the linoleum floors and carpet and my older brothers pitched in with the demolition of the kitchen. I was especially excited to see the bulkhead go. The new cabinets will reach to the ceiling, making the room feel much bigger and taller, as well as adding extra storage.


My dad took care of the new insulation and moving some outlets. While he had originally planned to do the drywalling himself, we thought it best to bring in a professional to patch the walls seamlessly.


The last time I was home, the painting had started. We are really lightening up the space with a soft, muddy blue/green colour rather than the coffee colour seen in the 'befores'


It's hard to believe that when I'm in Waterloo next weekend we will have our hardwood floors and new cabinets installed! Then it will be a couple of weeks for the new quartz counter tops to be made and installed. I can't wait to show you the big reveal!
Photobucket

1.23.2016

Project Northlake: Kitchen Reno - Before Pictures

I'm excited to announce that I'm working with some clients very near and dear to my heart on a kitchen reno...my parents! My parents still live in the house I was born in, so it's been very different taking on a project that will change a room where so many fond personal memories have been made, but it is definitely time for an update.

Today I'm sharing the 'befores' with all of you, so the blog is about to get decidedly less cute! The honey oak cabinets made the space feel dated so we are replacing with solid maple cabinets painted white. We are more or less keeping the current layout as it works well, but we are upgrading finishes throughout to include hardwood floors, quartz countertops and marble backsplash. 


We are removing the railing separating the kitchen from the family room to open up the feeling of space.
The bulkhead is also coming down to make weigh for 42" uppers and a nice chunky crown molding.
As a cost savings, we are keeping the existing fridge and stove, which are in good condition. Plus, my mom is not a fan of stainless steel!


The pantry will be moving to the end of the run of cabinets.

I can't wait to share the afters with all of you, it's going to be a huge transformation. The plan is to really lighten, brighten, and modernize the space, create additional function and storage, and add value to the house. I'm so happy for my parents - they really deserve this!

Photobucket


12.26.2015

Oh Chrismas Tree 2015

Oh my gosh! Another year has gone by (with a dismal amount of blog posts on my part) and it's time to take down the Christmas tree already! I shared photos of my tree on instagram, but it is my first real tree since moving out and it deserves a blog post all of it's own. I filled the tree with vintage ornaments passed down by my parents and Babcia. I love the classic Christmas colour they provide.
 
Proud moment: Hauling the tree up to my third floor walk up apartment and getting it set up all by myself.
 Now for the lights and decorations!


 You just can't beat the smell of a fresh pine tree, it is truly the magical smell of Christmas. I hope you all had the most wonderful holiday season. Thank you for sticking with me despite there only being a few posts this year. I love you all!

xox
Photobucket

12.01.2015

Setting the Table, Sarah Style


I'm dreaming of a pink Christmas with this darling festive tablescape that I put together using Sarah Richardson's new textile line! These colours are perfect for year round, but the motif on the cotton napkins reminded me of snowflakes, which inspired me for the holidays. Place settings topped with coordinating Christmas tree decorations add to the fun and cheer, and are a great little 'take home' gift for friends. Speaking of gifts, wouldn't these table linens make a great one?


 Here are my top five tips for creating an effortless Christmas table setting:

1. Mix metals! A little brass, a little silver - it all works during the holidays, so don't worry if your cutlery doesn't match your glassware.
2. Create a no fuss centerpiece using seasonal greens such as Seeded Eucalyptus and fresh berry branches.
3. Candle light and Christmas tree lights set the perfect mood when the sun goes down.
4. More is sometimes more. My tiny table achieves big style by layering textures, colours and pattern.
4. Sarah's new linen line comes in four colour palettes making it easy to look like you spent hours decorating the table. The placemats are reversible, and everything is cotton and easily washable.

xox
Photobucket

11.30.2015

Mantel Makeover: Holiday Edition


With the holidays fast approaching, two things in particular about my new apartment were making me very excited for Christmas decorating. The first was that my place is big enough to get a big tree (remember the teeny little tree I've been using for the past couple of years?) and the second was that I had a mantel to style up! 

I kept it pretty simple with natural elements and classic red and green to give the mantel some holiday cheer. I wanted it to feel very traditional, sophisticated and (of course) beautiful.

A quick trip out to my favourite local florist proved successful. The flower shop is such a magical place at this time of year, filled to the brim with all the trimmings for gorgeous bouquets, wreath and garland making. I picked up a lovely foxwood wreath, a large swag of leyland cypress branches, fresh red berry branches, and a big bouquet of seeded eucalyptus (for a center piece). I also grabbed some logs to fill up the fireplace - purely decorational as my fireplace is non-functioning, but I think they really add to the cozy feeling! I didn't do anything fancy, just hung the wreath with some fishing wire, tied a big bow and laid the branches out on the mantle. I like the lush, semi wild look this achieved.


Oh I just love Christmas decorating! Have you decorated your mantel? Link to it in the comments below!
xox
Photobucket

10.19.2015

DIY Ikea Hack Chest of Drawers

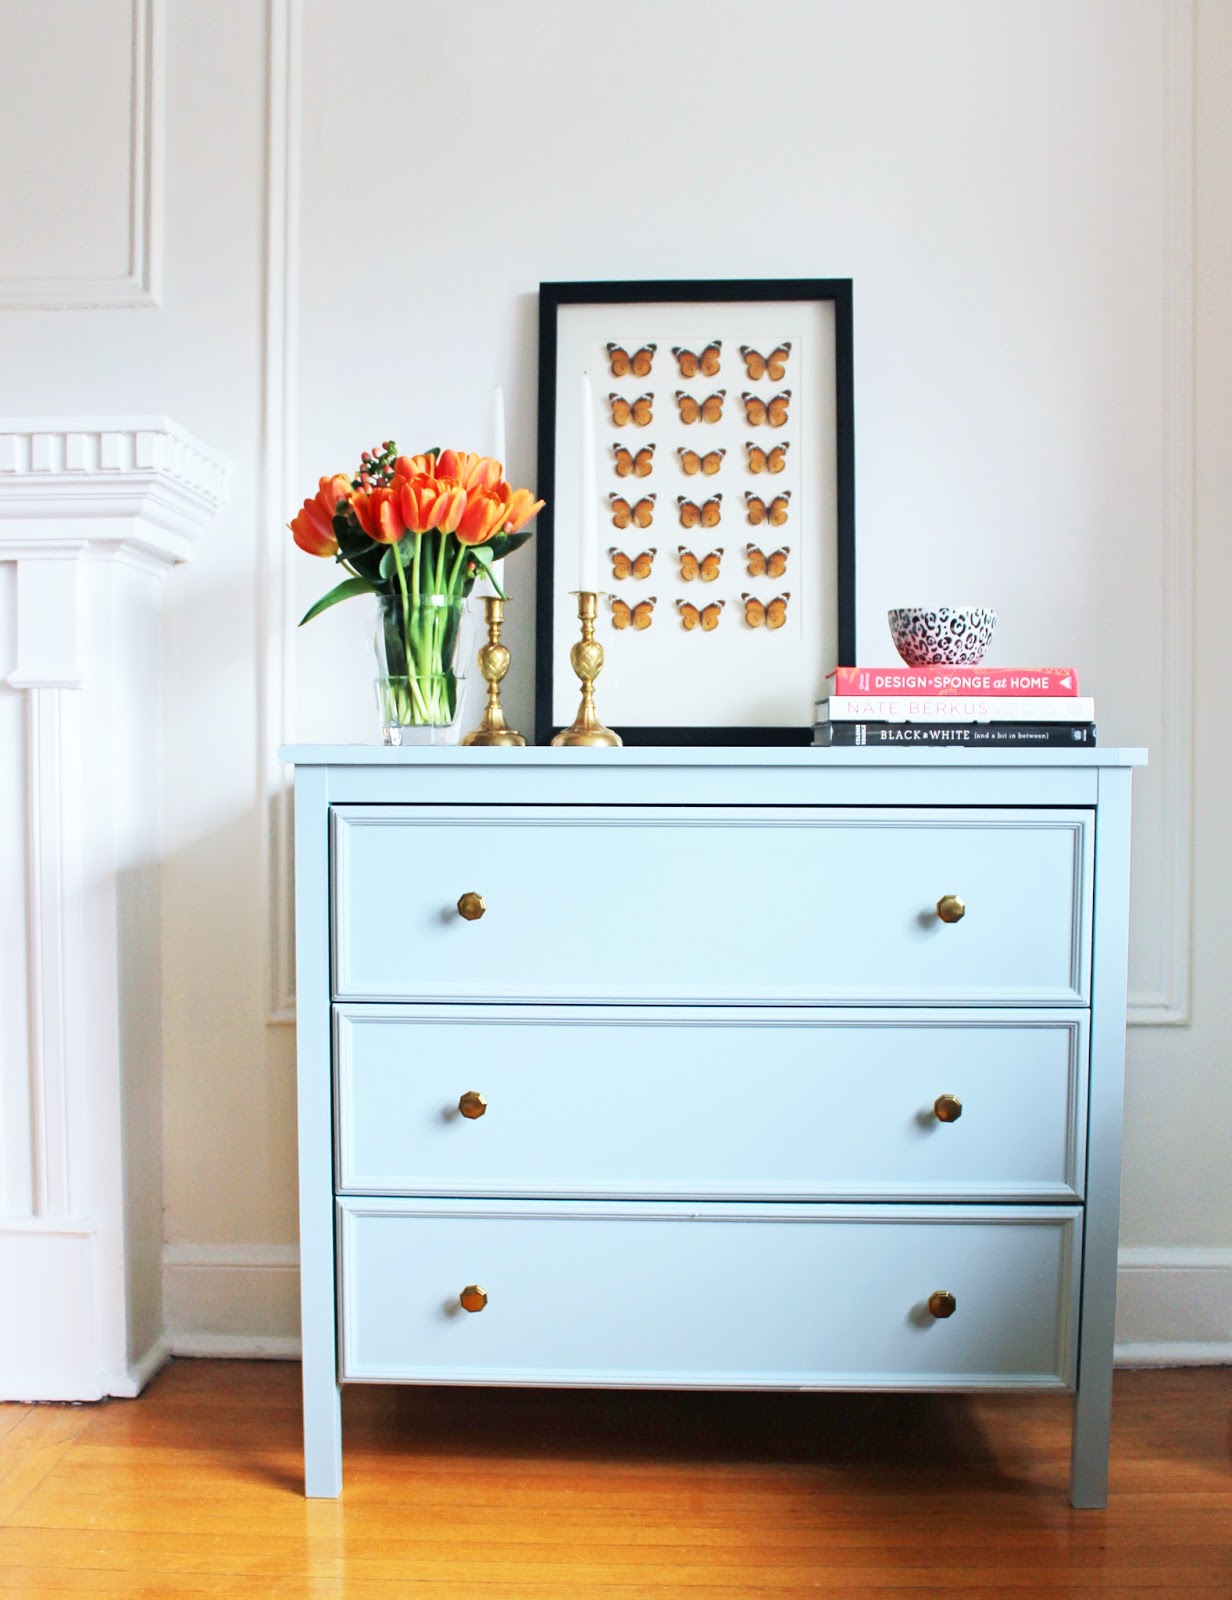
Ever since moving into my apartment in May, I have envisioned a pair of small dressers flanking my fireplace. This is one of my favourite looks and it also provides some much needed storage for my board games, dvds, cozy blankets for watching tv, etc. My dream was to find a matching vintage pair, but this proved to be a challenge. Vintage pairs of anything are hard to find, and because of their rarity are usually pretty expensive when you do finally find anything. I decided that for now, the best plan would be to try my hand at an ikea hack.

I bought the KOPPANG 3 drawer chest. I liked the simple lines as a nice blank canvas and the price was right.
I did the rest of the steps after assembling the dresser, but if I were to do it again I would add the trim and paint everything before putting it together to make the job easier.

Next I bought some small decorative trim from the Home Depot and used a saw and mitre box to cut it. I glued the trim pieces onto the drawer faces using No More Nails glue and filled in any gaps in the mitred corners with paintable caulking. The trim really helps to make this streamlined piece look more traditional.

Next came priming and paint. I used the Zinnser Shellac Based primer (which Jenny of Little Green Notebook swears by for painting IKEA furniture).  I painted out the dressers in a beautiful robin's egg blue called Cape Hope by Beauti-Tone paints.
Lastly, I switched out the cheapy-cheap black plastic knobs that came with the dresser for some pretty brass octagonal knobs that I got a liquidation shop in my home town for only $2 a piece and voila!
I think that the dressers now have that vintage/traditional look that I was hunting for. It's also my first time owning any painted furniture, and I have to say, I'm loving the dose of colour!!


The place is really coming together! In the living room all that's left to do is a buy few accessories, get my cane chairs reupholstered, sew a couple of small lumbar pillows and paint something big for over the sofa. In an ideal world I would also ditch that ceiling fan. Have you ever done an ikea hack? Share the link in the comments and I will be sure to check it out!

xox
Photobucket