PhotobucketPhotobucketPhotobucketPhotobucketPhotobucketPhotobucket

7.14.2012

Cleaning My Room This Weekend

via Vogue, Photographed by Mario Testino

via Vogue, Photographed by Mario Testino
Why can't I look as fabulous as SJP when surrounded by a mess of a room? Instead, I'm sitting here sans makeup, in some sweats and a Tee, hair astray, ready to tackle my mess of a bedroom.
Sometimes, when I get really busy, my tidiness slips up a bit.
How are you guys spending your weekend? xo 
Photobucket

7.13.2012

Favourite Furniture Fridays: Hello Lovely

For Today's Guest Post we Have the darling Sarah from Hello Lovely. This girl is seriously my blog twin, separated at birth.

Hello Lovelies! I am so happy to be here with you today! I adore Tiffany's blog so this is so exciting for me! Yay! I have also read some of your sweet comments so I know she has some pretty awesome followers! Today I'm going to share my favourite furniture piece from my home. When Tiffany first asked me, I really had to think, hmmm what is my favourite piece!?! I am very picky, so unless I LOVE it, I don't have it in my home...but I think if I had to choose one thing, it would be my coffee table. 
Our little coffee table almost didn't make it here though....My Husband and I actually went searching for an ottoman. I thought it would be more comfy and relaxed for our living room. We searched high and low and finally found one. We drove over an hour to get this ottoman. I was so sure this was it. Until....I.saw.it. 

A shiny sparkler out of the corner of my eye. My Husband thought I was nuts. I was going on and on about the ottoman and now here I was dying over this coffee table! We decided that we came for the ottoman, it was the perfect one we had been searching for, so we bought it. There, done. That night we sat down to watch Sarah's House Season 4 and there.it.was...MY COFFEE TABLE!!! 
via Sarah Richardson
 It was a sign from Sarah herself! I made the wrong choice! Let's just say I could NOT sleep that night. All I could think about was that darn coffee table! I woke up and called the store as soon as it opened and luckily they let me change my order! A few weeks later this little beauty was in our living room and I have loved it ever since. Hope you like it too!
 xoxo, Sarah
When Sarah Richardson speaks, we all listen! I love this glam little coffee table, especially those dainty caster feet! Great find Sarah, and thank you for sharing. Don't forget to check out Hello Lovely for yourselves!
 Do you have a piece of furniture you'd like to share? E-mail me to be featured in our weekly FFF series: tiffanyleighinteriordesign@gmail.com
Photobucket

7.12.2012

Dream House Alphabet: G

G is for: GUT JOB
Okay, the word gut is kinda icky....and so are the 'before' pics I'm about to show you.

To quote the brilliant Sarah Richardson:
"Ever dream of buying a house, gutting it, and rebuilding so it's perfectly you?"
Why Yes Sarah...yes I do.
As an aspiring designer, I can't imagine buying a house that has already been updated and renovated by someone else, because well, let's face it... tearing out those new granite counter tops the previous owner installed seems like a waste, but what I really want is some Carrera marble...You know what I'm saying?
Instead, give me something that looks like this:
Elana's Kitchen Before via Style Sheet
 No guilt tearing that baby out, believe me.
So, where does that leave me exactly? Buying an old rundown piece of  crap work, that's where.

Elana Safronsky, a blogger at HGTV's Style Sheet, is taking her mess of a house and gutting it to transform it into a little dream! She takes it from gut it to love it!
Elana's Baby Room Makeover via Style Sheet
Elana's Foyer Markover via Style Sheet
 Now there's a girl that gets me! Thank goodness for those 'Afters' or this would be one ugly post!
Basically, I just want a home that's perfectly me, and I think I need a fixer-upper to get it.
Do you guys think I'm nuts, or do you understand? This is MY dream house we are talking about after all.
Photobucket

7.11.2012

Wednesday's Doodle: Tufted Pink Chair

  
As I mentioned last week, I got myself a set of watercolour paints and have been experimenting with them! For you today, I've painted up this darling pink tufted chair. The variation in tones is much more distinct in person, but it wouldn't show up for me on the computer. Probably because I photographed this with artificial light...bad blogger. Either way, I like the result and am loving the watercolours! I'm used to painting with oils, and these really are so much easier to work with (they dry so quick!) and to clean!

I don't usually say this but...I can't believe it's only Wednesday. Does this week feel extra long to anyone else?
Photobucket

7.10.2012

New Client Project

My dearest friend (and now client) Laura has asked me to help her revamp a couple of outdoor stools.
The fabric they are currently covered in is ripped and dirty, so I've  been on the hunt for some nice outdoor fabric to recover them in! I can't wait to get my hands on them to show you all the before and after pics!

I'm leaning towards this chic, contemporary and BLACK one. Won't show the dirt from summer's bare feet and I mean, really, who doesn't love a good trellis? It reminds me a bit of this chair covered in Kelly Wearstler's Imperial Trellis, but of course at a FRACTION of the cost:
Marmalade Interiors via Decor Pad
Then again...a nice nautical stripe is totally beachy and fun, and would help turn her tiny little patio into an outdoor oasis! 
Hmm, decisions, decisions. I'll have to consult the bestie on this one! In the mean time, which do YOU prefer?
xo
Photobucket

7.09.2012

Giveaway Winner

 Thank you so much to everyone who entered my 100 Followers Giveaway! I truly wish that you all could have won!  You are amazing.
Congrats Sarah! I will be e-mailing you for your info very soon!
Good night my sweet blog friends. xo
Photobucket

DIY: My 'Brilliant' Glitter Art

Warning: This DIY will leave you feeling looking sparkly for days
Cost: About $10 (excluding frame)
Difficulty: 3/5

Recently, while watching Home with Novogratz, I discovered the amazingly talented glitter artist Camomile Hixon who combines glitter with a sense of humour and purpose to create some amazing artworks. I especially like her word art, so I decided to recreate the look with some glitter, some glue, and a homemade stencil!
The materials:
1. A picture frame
2. Painter's tape
3. 24 kt Gold Extra Fine Glitter (or any colour you want!)
4. Permanent Marker
5. Fine cutting knife
6. Spray glue (The jar of glue you see pictured didn't work)
7. Cutting Surface
8. Cardstock Paper (I used printer paper, but it got so wrinkled..go with a heavier stock)
9. Overhead paper (You know..that clear plastic paper)
10. Newspaper
11. A heavy book
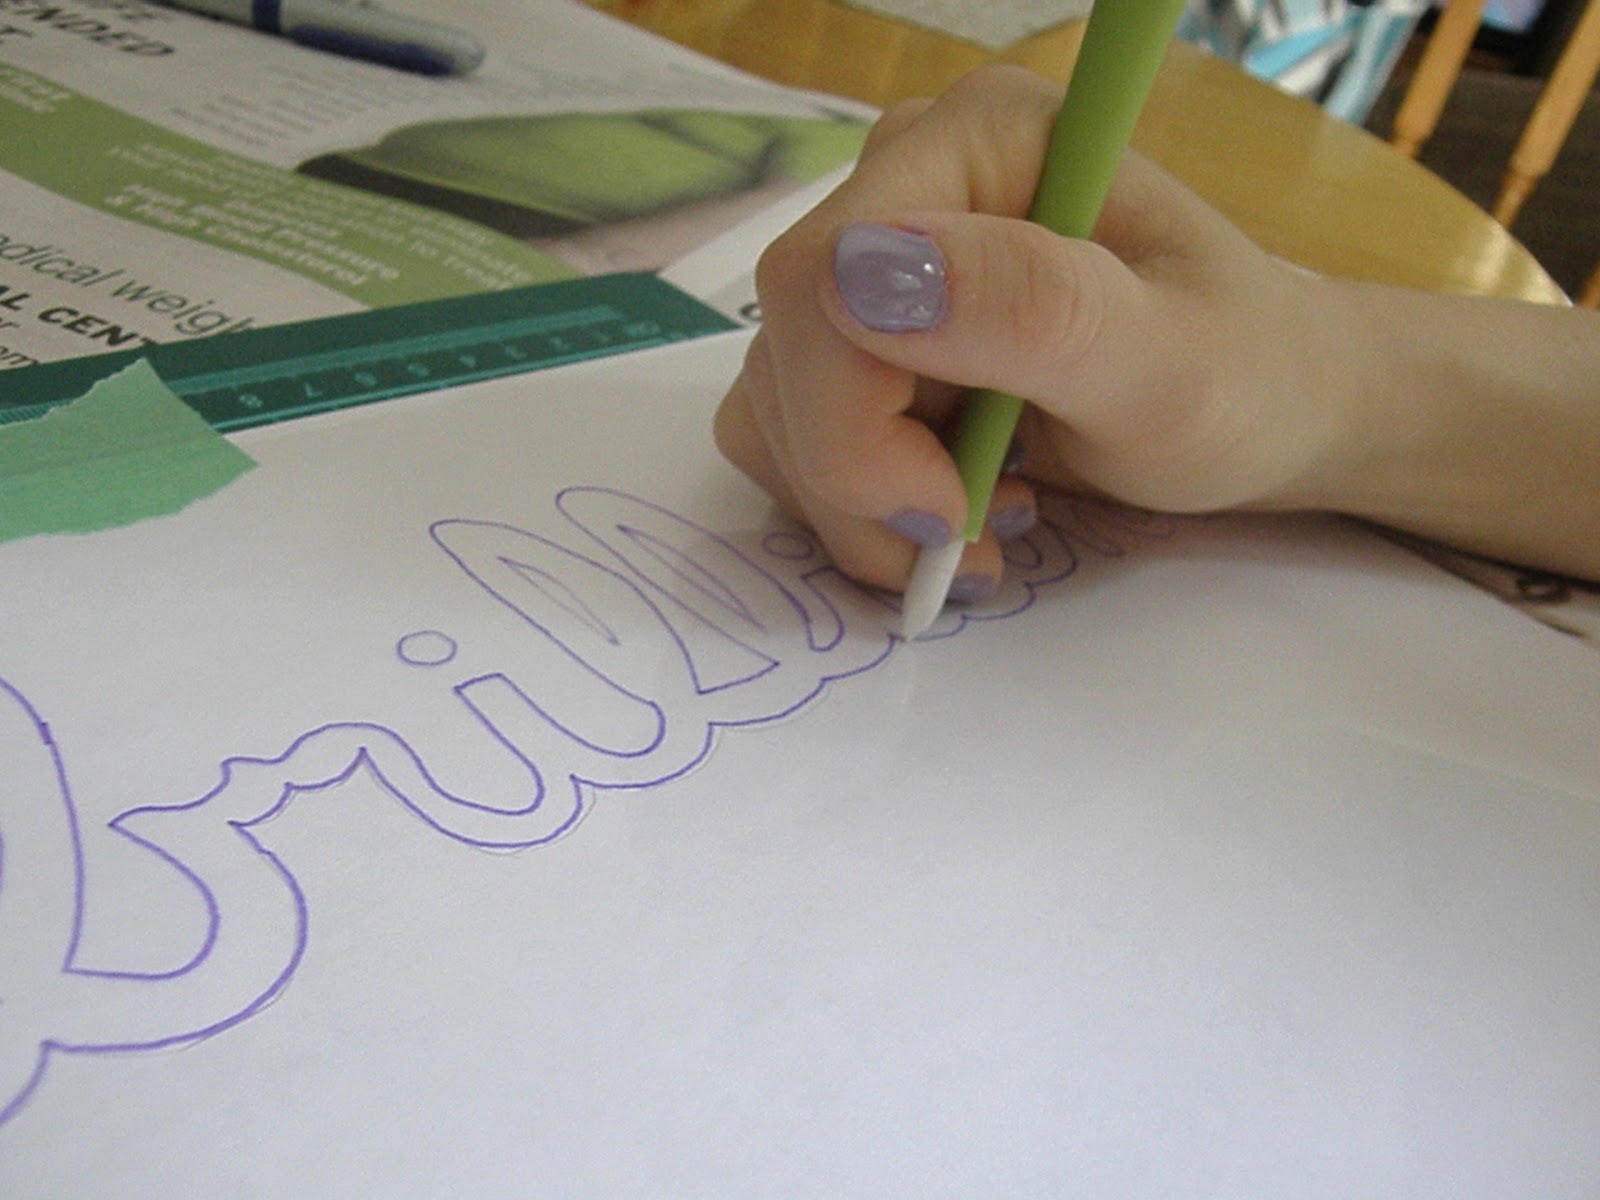
Write your word of choice onto the clear paper using permanent marker. You can free hand it like I did, or you can print off the word and trace it.
 Carefully cut out your stencil using a fine cutting tool. Take your time with this process.
Attach the stencil to your cardstock with painters tape. Also use painters tape in the center of letters where you do not want glitter (like I did here in the B, Ls and A).
This step was an epic fail.  Save yourself the hassel and use spray glue over your entire stencil (also make sure everywhere you don't want glue is covered in painters tape. I didn't and the newspaper stuck...See in the next photo where the upper right hand corner is bare)
Cover the whole thing in glitter!!!
Cover with newspaper and a heavy book, to ensure that lots of glitter sticks. Leave for about 20 minutes, remove the book and newspaper. Shake off all the excess glitter (I was able to pour most of it back into the jar).  Lastly, spray the piece again with the spray glue to seal in the glitter. Let it dry for about 20 more minutes. Carefully peel off the painters tape and stencil.
Frame your masterpiece!
I love how sparkly and glittery it turned out, it even has a bit of a 3D pop. The edges aren't perfectly crisp, but the scattering of glitter is so pretty. The word 'brilliant' sitting on my desk will inspire me to believe in my ideas every day!
Now that I've taken you through the whole messy process...I will let you in on my secret for the NEXT time I create some glitter art....glitter paper. I think it'll make the whole process a lot less messy.
What do you think?!
xo
Photobucket 
Ps. I'm picking the winner of my giveaway TONIGHT as promised. Last chance to enter!

7.08.2012

Girl's Night and A Reminder!

Last night I hit up a swanky downtown restaurant in an old converted factory with my girls.
It inspired me to get a little dolled up and to share the look with all of you!

Spikey Necklace Glam


There was no one home to take my photo so I had to settle for a selfie!
Pair a sheer white blouse with semi high waisted black shorts. A spikey necklace like this one from H&M and a more feminine classic clutch (you may recognize mine from my bathroom reveal) creates the perfect balance between girly and edgey. Polish off the look with a sexy pair of black pumps.

If you like the look of my clutch from H&M, then you will LOVE the earrings I am giving away TOMORROW! That's right girls, you only have until tomorrow evening to enter!
Good luck!
What would you wear out for dinner with the besties? xo
Photobucket

7.06.2012

Favourite Furniture Fridays: Hodge Podge by Markova Design

 Today's guest blogger is the talented (and Canadian) Barbara from
Hodge Podge by Markova Design
!
It's exciting to be visiting Tiffany's blog today sharing one of my favourite pieces of furniture in my home. 
Last year after we switched the kids' bedrooms around, our middle child, J, who is now a 16 year old blonde eyed beauty, moved into a bright and sunny room. It is one of my favourite rooms in the house, as I have stepped out of my comfort zone and embraced colours I normally don't use in my house. We have been using her room as a design lab and are thrilled with the results.
The first pop of colour was on this amazing night table, that had seen better days, I found on Craigslist for only $25! 
It had a sad 70's laquer top that was quite scuffed. After a good sanding, some primer and a fresh coat of  Spectra Blue, 2049-50,  by Benjamin Moore, it looks amazing against the dark brown and cream stripes of J's walls.
I decided the leave the original hardware as-is, as I loved the patina and style.
So if you are ever feeling daring and adventurous with colour, try it on small pieces for great visual impact! Thanks again for having me visit Tiffany. Hope everyone has a wonderful weekend!
XO Barbara
Thank you so much for sharing Barbara, such an amazing transformation! Your daughter is a lucky girl to have such a gorgeous bedroom (and talented mama). Be sure to check out her blog!
 

Photobucket

7.05.2012

THIS.DESK.

I am currently drooling over this desk from IKEA. It has my mind rolling with so many ideas.

The description says "A long table top makes it easy to create a workspace for two", but I thought, what about a space for ONE to do both work and beauty? It would cut down the need for two pieces of furniture in a smaller, studio style space. The high gloss white and slim leg design would make it visually light and airy.
Let me show you what I mean with a quick sketch (maybe this makes up for the lack of doodle yesterday):
A venetian mirror over one side, with a jar of makeup brushes and a tray of lipsticks.
A fabric covered inspiration board over the other side, with laptop and office supplies!
You could even mix up the seating for extra fun.
I've always wanted an extra long desk
like this:
via
 Or this:
via
 Or this:
via
Is there room for this in my student rental come October? Well, No...
Is that going to stop me? Let's just say I love a good design challenge so we will see!
xo
Photobucket 
ps. Only a few more days to enter to win my earrings giveaway! Get in on it while you still can ;)