Warning: This DIY will leave you
feeling looking sparkly for days
Cost: About $10 (excluding frame)
Difficulty: 3/5
Recently, while watching Home with Novogratz, I discovered the amazingly talented glitter artist
Camomile Hixon who combines glitter with a sense of humour and purpose to create some amazing artworks. I especially like her word art, so I decided to recreate the look with some glitter, some glue, and a homemade stencil!
The materials:
1. A picture frame
2. Painter's tape
3. 24 kt Gold Extra Fine Glitter (or any colour you want!)
4. Permanent Marker
5. Fine cutting knife
6. Spray glue (The jar of glue you see pictured didn't work)
7. Cutting Surface
8. Cardstock Paper (I used printer paper, but it got so wrinkled..go with a heavier stock)
9. Overhead paper (You know..that clear plastic paper)
10. Newspaper
11. A heavy book
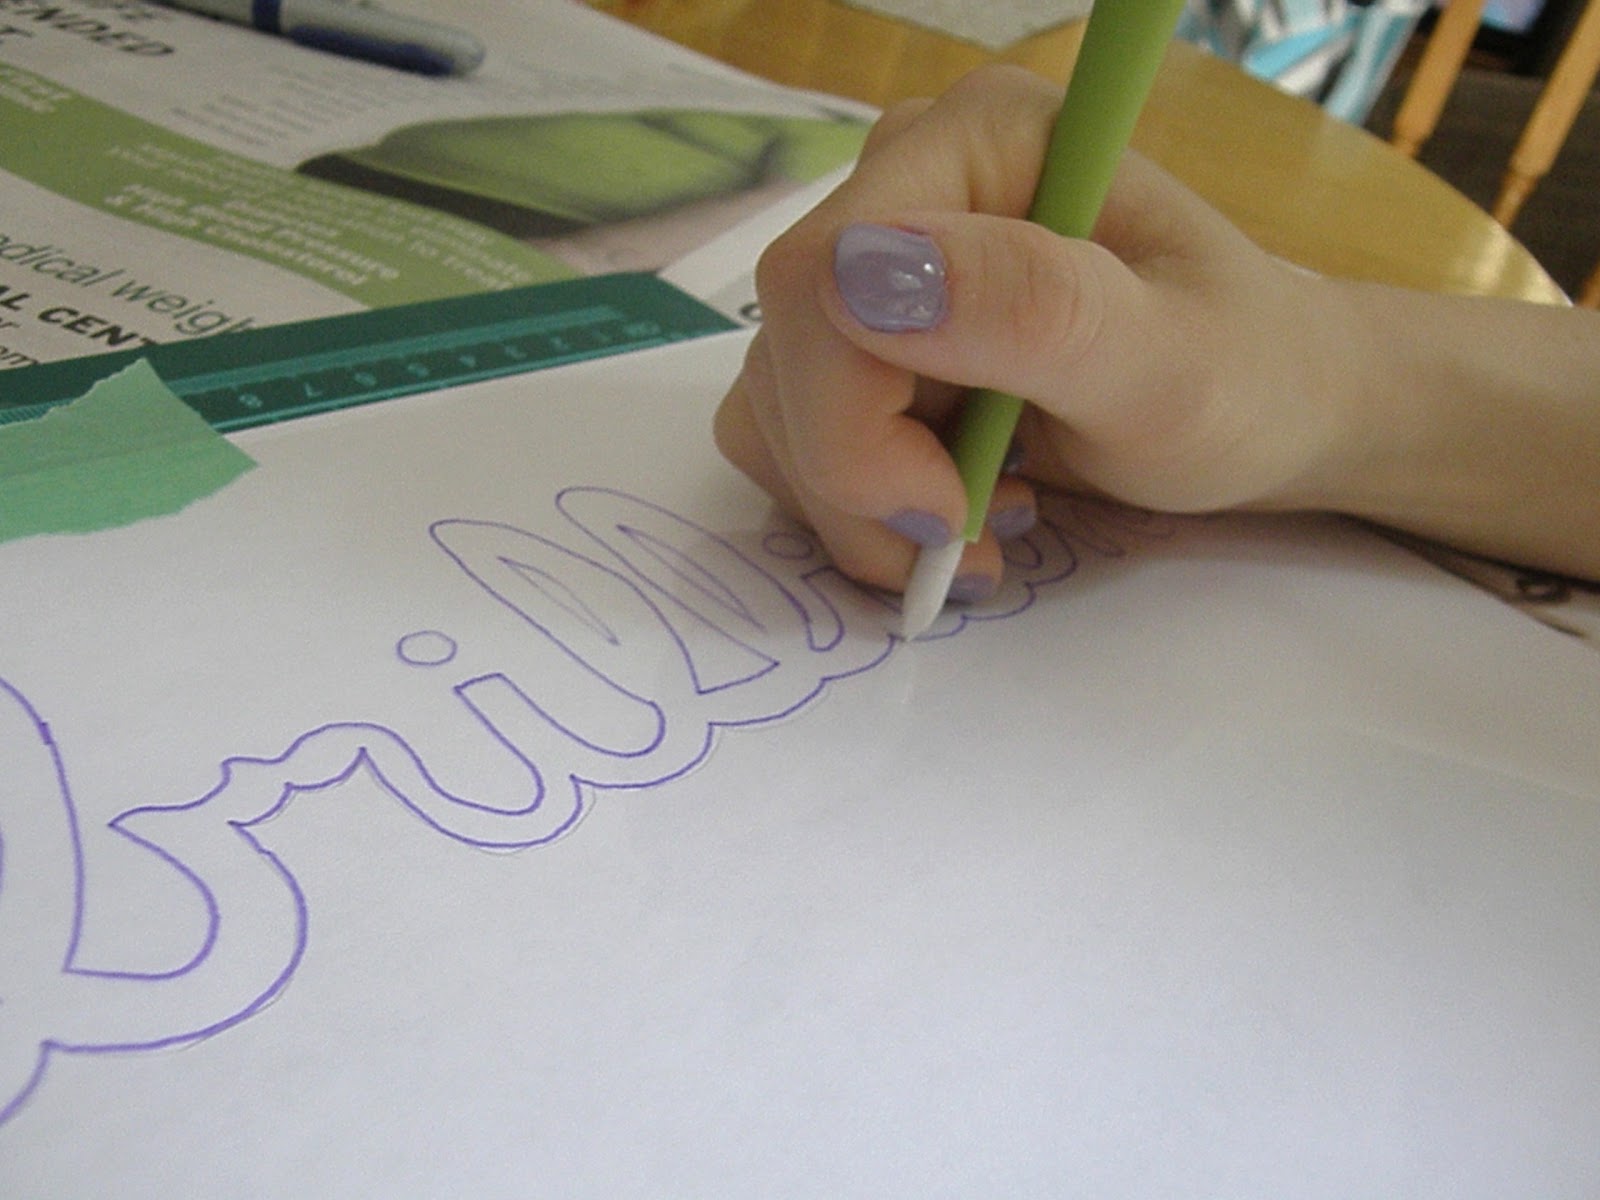
Write your word of choice onto the clear paper using permanent marker. You can free hand it like I did, or you can print off the word and trace it.
Carefully cut out your stencil using a fine cutting tool. Take your time with this process.
Attach the stencil to your cardstock with painters tape. Also use painters tape in the center of letters where you do not want glitter (like I did here in the B, Ls and A).
This step was an epic fail. Save yourself the hassel and use spray glue over your entire stencil (also make sure everywhere you don't want glue is covered in painters tape. I didn't and the newspaper stuck...See in the next photo where the upper right hand corner is bare)
Cover the whole thing in glitter!!!
Cover with newspaper and a heavy book, to ensure that lots of glitter sticks. Leave for about 20 minutes, remove the book and newspaper. Shake off all the excess glitter (I was able to pour most of it back into the jar). Lastly, spray the piece again with the spray glue to seal in the glitter. Let it dry for about 20 more minutes. Carefully peel off the painters tape and stencil.
Frame your masterpiece!
I love how sparkly and glittery it turned out, it even has a bit of a 3D pop. The edges aren't perfectly crisp, but the scattering of glitter is so pretty. The word 'brilliant' sitting on my desk will inspire me to believe in my ideas every day!
Now that I've taken you through the whole messy process...I will let you in on my secret for the NEXT time I create some glitter art....glitter paper. I think it'll make the whole process a lot less messy.
What do you think?!
xo

Ps. I'm picking the winner of my
giveaway TONIGHT as promised. Last chance to enter!


13 comments:
I love this DIY!
It's fabulous, and so simple!
Totally brilliant! :) I love it. And I have a lot of glitter on hand (weird statement I know) and wished I had something to do with it. Now I do! Thanks!! :)
Great DIY! Very Kate Spade ;) Found your blog via the Alt class tonight. Looking forward to exploring more!
SO glam! LOVE! And I think you put our "snobby dear" in the photos to taunt me...I love it and am oh so jealous!
xoxo, Sarah
Love it, Tiff! You did a greaaat job! Also - totally obsessed with your brass deer :)
Really like this, its a simple idea but `brilliant!'
http://whatkimmididnext.blogspot.co.uk/
Hats off to you for your creativity! This is so girlish and gorgeous!
What a great idea! This is added to my DIY list.
I just came across your blog, so many great ideas!
xo
Alison
heartofgoldandluxury.blogspot.com
Brilliant!
Attempting this as we speak. I'll let you know how it turns out! Fingers crossed! xo
holly
www.threelayercake.blogspot.com
Completed the DIY project and LOVE the outcome! Funny bit: Glitter did get EVERYWHERE! My boyfriend went to a work event the day I did the DIY and his boss pointed out that there was glitter on his face.... hahahahha whoopsies!
Thanks again for a fun DIY!
xx
holly foxen wells
www.threelayercake.blogspot.com
Such a cute DIY project. What a great inspiring idea. I will have to try this for my next DIY
Post a Comment